Getting Started
From sign-up to your first governed build
This guide walks you through account registration, creating your first organization and project, and triggering a build with real-time event streaming. By the end, you will have a complete evidence bundle ready for review.
Create your account
Sign up with your work email and set a secure password. After email verification, you land on the organization creation screen automatically.
- Navigate to
/auth/registeror click Get Started in the top navigation. - Enter your name, work email address, and a strong password.
- Click Create Account. A verification email is sent to your inbox.
- Click the verification link in the email to activate your account.
[Screenshot: Registration form with name, email, and password fields — pending capture]
[Screenshot: Email verification confirmation page — pending capture]
Set up your organization
Organizations are the top-level container for projects, members, builds, and billing. Every user belongs to at least one organization.
- Enter an organization name and optional slug (used in URLs and API paths).
- Invite team members by email. They receive invitation links with the role you assign.
- Choose a subscription tier. Free tier includes limited build credits for evaluation.
[Screenshot: Organization creation form with name, slug, and tier selection — pending capture]
[Screenshot: Team invitation modal with email input and role selector — pending capture]
Create your first project
Projects organize builds, prompts, and evidence under a shared context. Each project tracks its own build history and configuration.
- From the organization dashboard, click New Project.
- Enter a project name and optional description that helps team members understand its purpose.
- Configure baseline settings: default build mode, preferred LLM provider, and default model.
[Screenshot: New project form with name, description, and default settings — pending capture]
[Screenshot: Project dashboard after creation showing empty build history — pending capture]
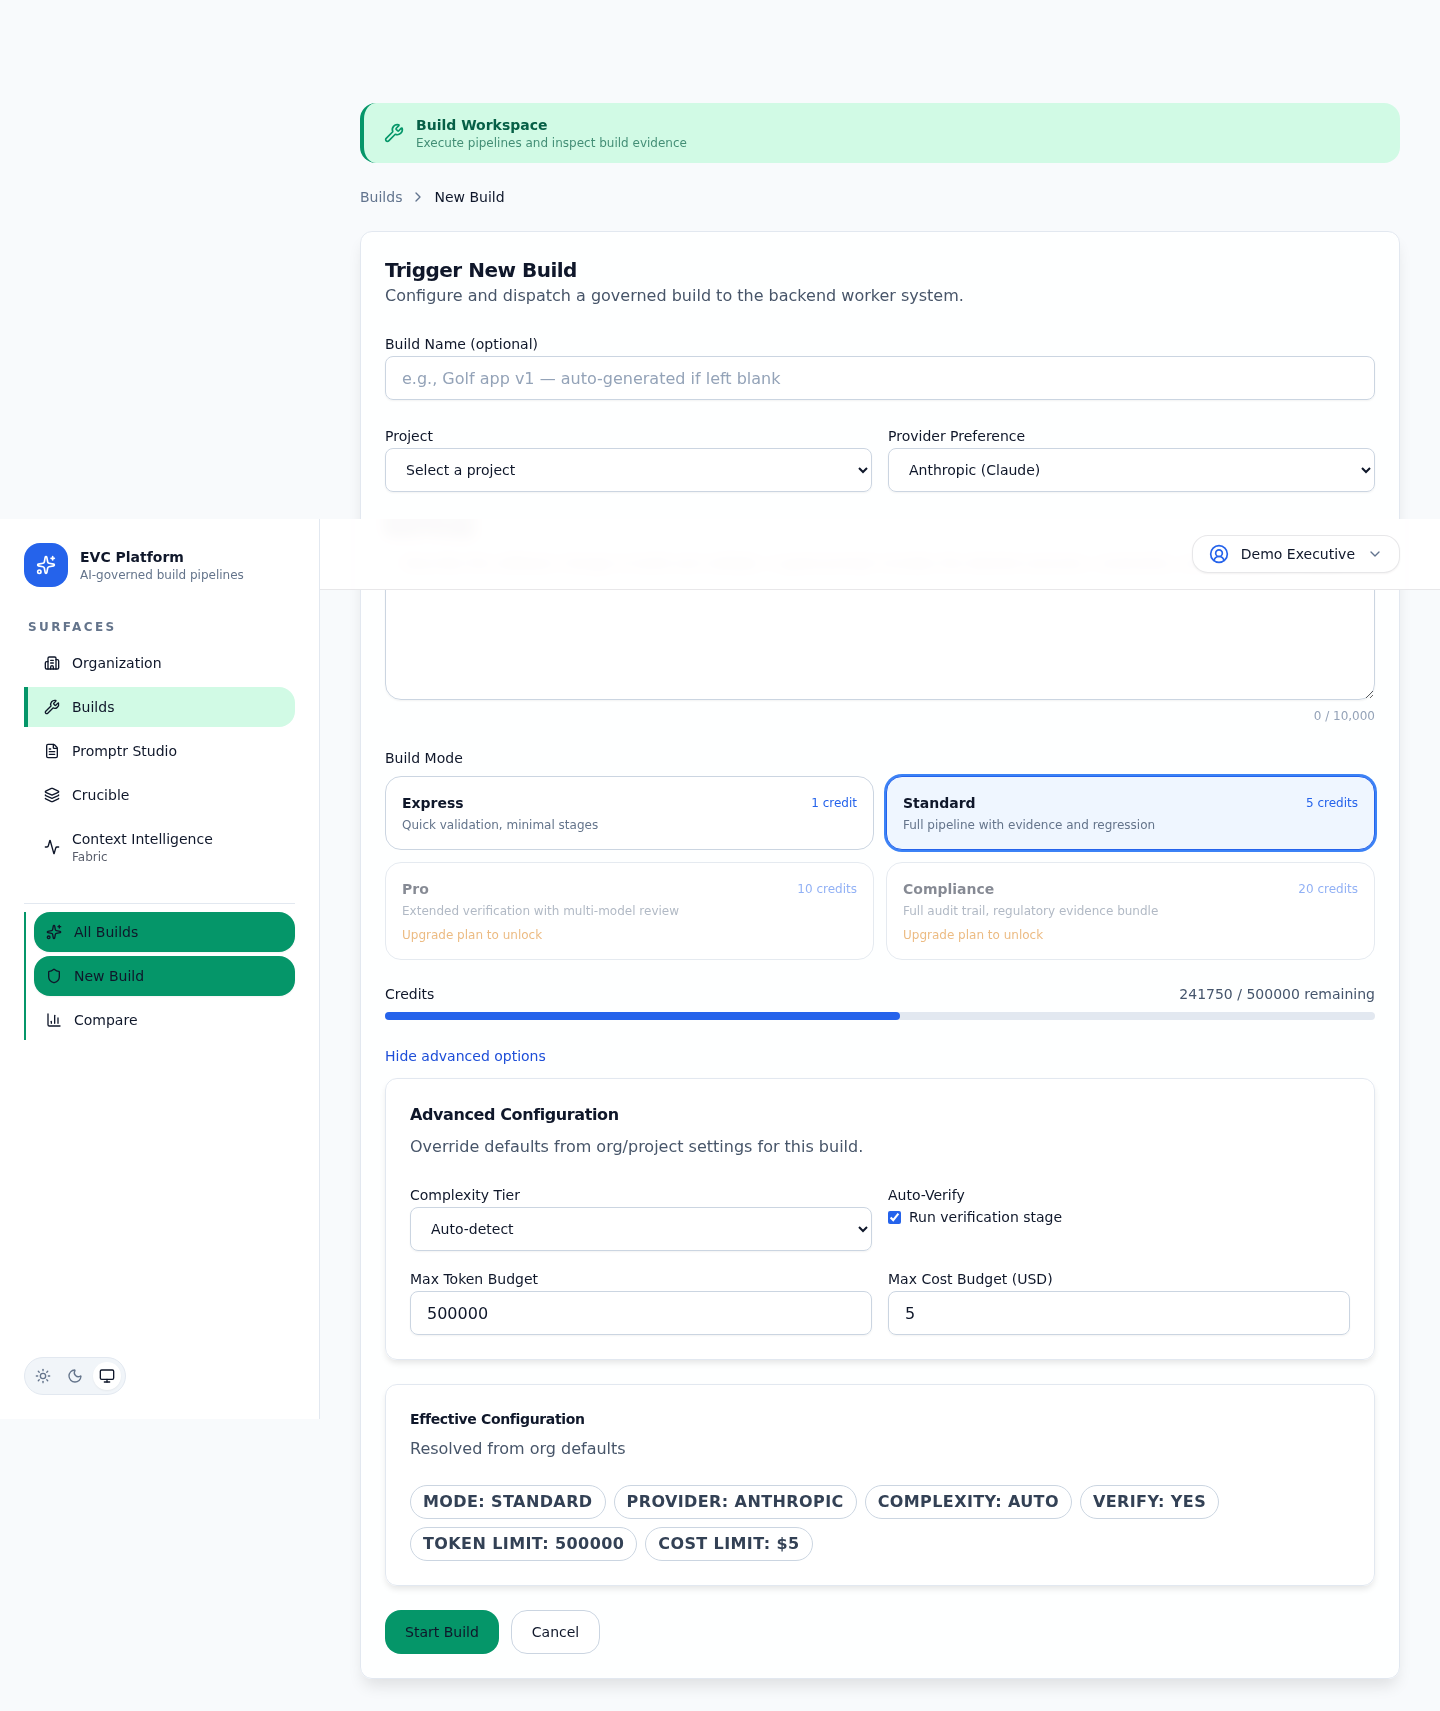
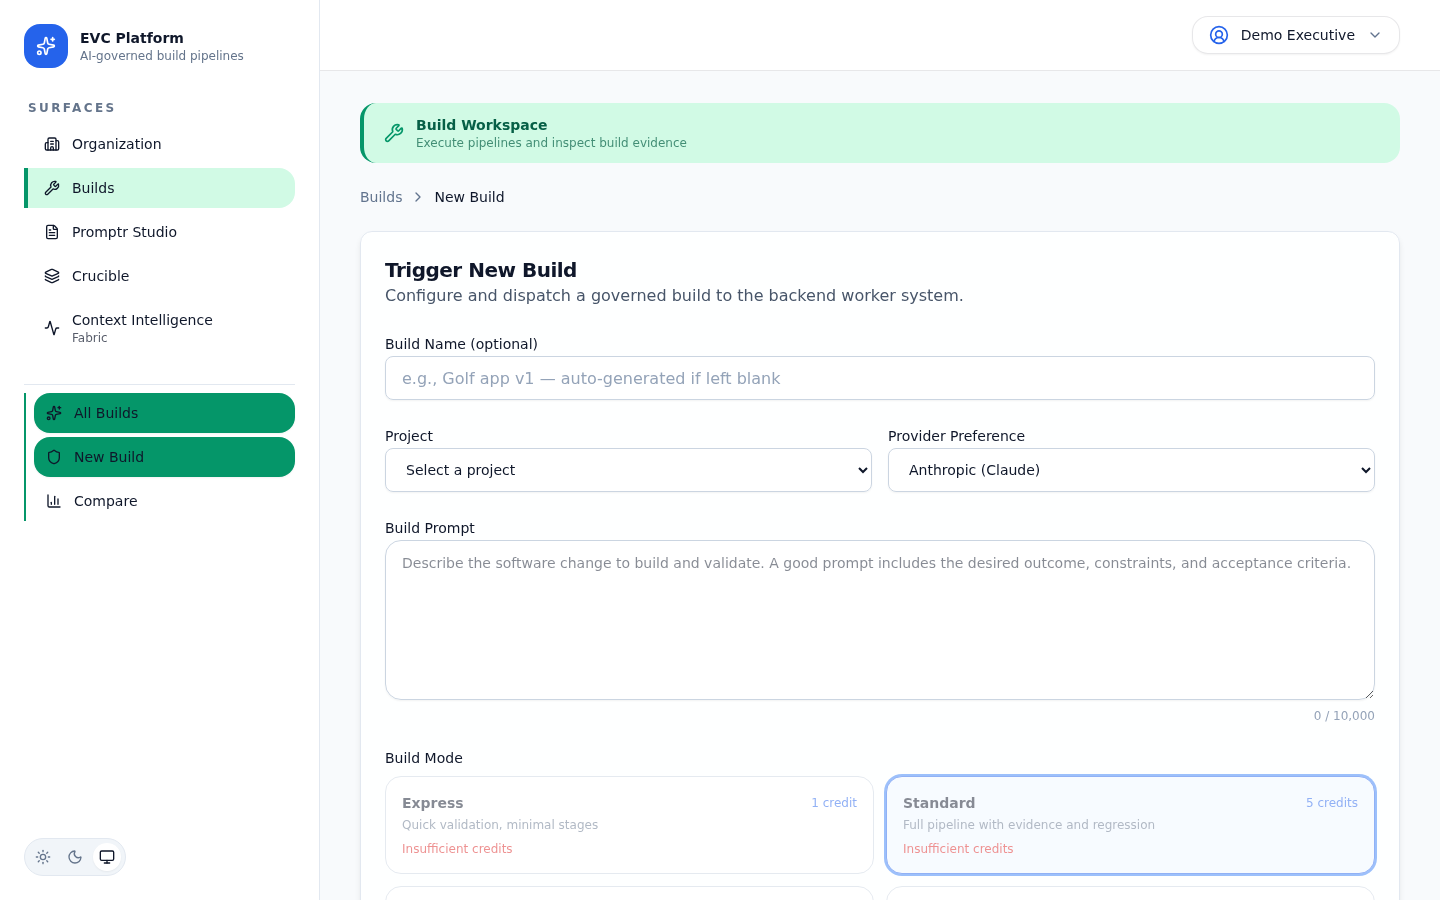
Trigger your first build
A build takes your prompt, runs it through the EVC pipeline with your chosen configuration, and produces artifacts with a full evidence trail.
- Click New Build from the project dashboard.
- Select a build mode: Express for fast iteration or Standard for governed delivery.
- Write your prompt or select a saved prompt from Promptr Studio.
- Choose the LLM provider and model. The cost estimate updates in real time.
- Click Start Build. Events stream to the UI as the pipeline executes.
[Screenshot: Real-time build event stream showing stage progression — pending capture]
Review build results and evidence
After the build completes, review the execution timeline, generated artifacts, governance outcomes, and the full evidence bundle.
- Open the completed build from the project build list.
- Review the Timeline tab to see each execution stage, its duration, and outcome.
- Check the Artifacts tab to download or inspect generated files.
- Review the Evidence tab for the full governance record.
- Check Cost to see token usage and credit consumption.
[Screenshot: Artifacts tab listing generated files with download links — pending capture]
[Screenshot: Evidence bundle summary with governance pass/fail indicators — pending capture]
What to explore next
Now that you have completed your first build, explore the rest of the platform to get the most from evidence-verified delivery.